 Shaw Direct’s Advanced HDPVR 630
has an integrated hard drive which allows you to record up to 175 hours
of standard definition content, or about 45 hours of high definition
content. Not enough space for all of the great shows you want to record?
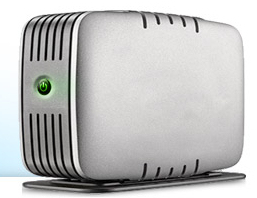
Not to worry – if you need more space, you can use an external hard
drive to make sure you don’t miss a thing.
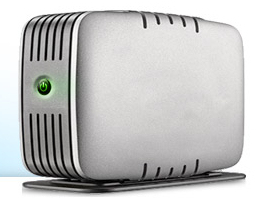
Wondering what kind of external hard drive will work with your HDPVR 630? Here are the required features to ensure compatibility:
- Make sure the external hard drive has an eSATA connection, which is up to six times faster than even USB 2.0. This makes the external hard drive ideal for HD video. What’s more is that you can record two HD programs while watching previously recorded HD programming without any performance issues.
- The external hard drive must be externally powered. Some may only be USB powered, but this will need to have its own power supply that plugs into an AC outlet.
- The largest external hard drive that will work is 2.0 TB, which will give you an incredible amount of additional storage space. 500 GB will give you about 340 hours of standard definition or 90 hours of high definition; 1.0 TB will provide about 680 hours of standard definition or 180 hours of high definition; 2.0 TB gives you a staggering 1,360 hours of standard definition or 360 hours of high definition. If you were to fill a 2.0 TB external hard drive and the hard drive of your PVR with standard definition programming, you could watch shows from today (March 7) non-stop until May 10!
- Look for an external hard drive that is rated for PVR or DVR usage. These are designed to be cooler, quieter, and support multiple HD streams being recorded or played at the same time. They’re also able to run all-day, everyday, which makes them the most reliable choice.
So, how do you go about hooking up the external hard drive to your PVR? There are just a few steps to get it ready:
- Connect the eSATA cable (it should be provided with the drive you purchased) from the external hard drive to the port labeled “eSATA” on the back of your HDPVR 630.
- Connect the power cable from your external hard drive to a power bar or wall outlet.
- If your external hard drive has a power switch, turn it on now. Ensure the power or status light illuminates.
- Restart your HDPVR 630 by holding down the power button on the front panel for 10 seconds.
- When the receiver comes back on, a setup wizard will guide you through the process of formatting the external hard drive for use with this satellite receiver. This will remove ALL data and partitions on the external hard drive.
- Formatting will complete within a few seconds and you will be alerted that your drive is ready for use.
There are some other things to bear in mind about using an external hard drive with your HDPVR 630. For example, you can only use one external hard drive with your PVR at any given time, and you can only use the external hard drive with one specific PVR. Additionally, the external hard drive won’t be able to be used with any other device while it’s “married” to your PVR.
If you decide to stop using your external hard drive with your PVR, or want to switch to a new one, you just need to disconnect it and reboot your PVR. The setup wizard will then alert you that your external hard drive is missing, and then will provide some prompts to delete it from your PVR. This will remove any associated recordings from the PVR list that were stored on the external hard drive, allowing you to connect a new one by following the setup instructions.
Having any problems using an external hard drive with your HDPVR 630? Check out Tech Central to read over some helpful tips, or let us know that you need a hand!

