Category Archives: How-To

eBilling – Easy as 1, 2, 3!

Wait! Who said you didn’t have super powers?! Whoever it is, go tell them off!
I’ll wait here!

22_bin

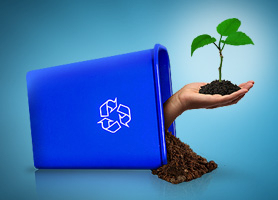
Seriously, though. You most definitely can do your part to make the world a better place. Heck! You’re probably already doing so! However, some of those many ways combine the useful with the pleasant. Take electronic billing for instance. Not only you get a notification through email as soon as your invoice is issued, but you also contribute to reduce the amount of paper in circulation. It’s somewhat like planting a tree with every electronic invoice you get. A green environment is a healthy environment! Hey! Put down that paintbrush and that green paint bucket! That’s not what I meant.

If we want to successfully make the world a greener place, we need to take the little details into account. After you sign up for electronic billing, you might want to have a personal account on our website. When we send your monthly billing summary via email, it is good practice for you to click the link to the detailed bill. That way you will be kept in the loop if we make any announcement. Besides, there are tons of things you will be able to do once you create an account online. Things like changing your programming, making a payment, viewing PDF versions of your invoices (those are very printer friendly), etc.

You can top it all off with an automatic withdrawal. The ways you can do this are literally endless. You can contact us to have it set up or… take a wild guess… Yup! You can also set up preauthorized payments through your personal account online. With instant invoice delivery via email, automatic payments through credit card or your bank account, the ability to manage your account online, all the power is yours.

Now you can simply sit back, relax, and let it all flow smoothly on its own. You can see more details here.  We thank you for your efforts towards a healthier environment.

By Rykselson H. A.

Bundling with Shaw

Interested in bundling your Shaw Direct satellite service with Shaw Internet and Shaw Home Phone? If you’re in a Shaw-serviceable region, you may be eligible to receive up to $15.00 off your services per month!

With Internet speeds up to 250 Mbps, access to thousands of complimentary Shaw Go WiFi sites,   free Shaw-to-Shaw calling, and the ability to check your home phone messages from any computer or mobile device, you simply can’t go wrong. Pair all of this with the most HD channels in Canada and 10,000 (and counting!) Shaw Direct On Demand titles, and you have a winning combination!

Not sure if you’re in a Shaw area? Check out Shaw’s website, and select your location up at the top of the page to see if Shaw Home Phone or Internet are available where you live.

If you’d like more details on this great bundle discount, call our One Shaw Care team at 1-855-237-8904!  They’re available from 9 a.m. to 8 p.m. Monday through Friday, and on Saturdays from 10:30 a.m. to 7 p.m.

If you don’t live in a Shaw area, you still may qualify for a discount on Internet with Xplornet. Find out more about this offer here.

*rg

Ordering Shaw Direct Pay Per View

ppv_entertainmentPerhaps you’re a fan of sporting events like UFC. Maybe you can’t get enough of the latest Hollywood hits. Or, perhaps 3D movies are your thing. Whatever your preference, Shaw Direct’s 32 HD Pay Per View channels have got you covered! Pay Per View is available to all Shaw Direct customers, so even if you don’t have a high speed Internet connection capable of supporting Shaw Direct On Demand, you can still enjoy the latest movies.

Our Pay Per View channels run from 950 to 953 for standard definition, or 960 to 983 for high definition, plus 986 is devoted to nothing but 3D movies. If you can’t view all of the listed Pay Per View channels in your guide, you may need an upgrade to part of your system; if you would like more information on upgrading, check out our previous article on the topic.

If you’ve never ordered Pay Per View before on your Advanced 600-Series receiver, it’s easy. First, open up your interactive programming guide by pressing GUIDE on your remote, and then navigate to the Pay Per View channels you’d like to browse (depending on whether you’d like to view standard definition, high definition, or 3D).

You can scroll through the Pay Per View channels by using the up or down arrow keys on your remote, and you can view what’s on later by pressing the right arrow (jumps ahead by 30 minutes), the fast forward button (jumps ahead six hours), or the skip forward button (jumps ahead one full day).

orderid

When you’ve found what you’d like to order, highlight the listing and look at the description of the title in the top right-hand corner of your guide. Just underneath of the title of the program, you’ll see “Order ID” followed by a four-digit number. Note this, and then call 1.866.782.7778. Follow the prompts provided by the phone system, and when asked, enter the four-digit order ID.

Once this has been completed, you’ll just need to go to the channel that the order was made for at the time the program is scheduled to start, and you’re ready to go!

For those of you who use PVRs, you can record Pay Per View titles that you’ve ordered, and you will have 48 hours to watch the title from your PVR list. After the 48-hour period has passed, the title will expire.

Wondering what’s on this month? You can view a list of the newest releases here.

*rg

Setting Up a Dish on a Tripod

If you use our Home Away From Home program and take your services with you, or live in an apartment building or condo where you can’t install a dish on the building, putting a dish on a tripod may be the best option for you. Wondering how to put it all together? Here’s a quick guide for you to follow!

Once you’ve ordered and received your tripod and dish kit, you’ll need to choose a location to set everything up. Our satellites are located above the Equator, due south of Fort McMurray, Alberta (111.1° west longitude), so generally speaking, you will need a clear line of sight to the south (if you live west of Fort McMurray, the view should be more to the southeast, while if you live east of there, it should be more to the southwest).

29_map

29_01You should have the dish, tripod and post that goes into the tripod, feed support arm, clamp mount, cable clip, and LNBF, and stabilizing screws (these would be used to keep the dish secured to the ground, kind of like spikes for a tent). You will require wrenches, vice grips, or pliers to complete this job.


29_02


First, you’ll want to set up the tripod itself. Start by pulling the legs apart so that the tripod is standing upright.

Now, insert the pipe into the centre of the tripod, and tighten the bolts until the pipe is secure.

29_03


Attach the clamp mount to the dish by aligning bolt posts with slits on sides.Ensure that the larger side of the bracket (right side of photo) is pointing towards the bottom of the dish.


29_04


Insert screw bolts into holes on back of dish. 

Tighten only very lightly at this point.


29_05


Take the dish, and attach the feed support arm to it, tightening bolt until secure.


29_06


Place dish on tripod and tighten bolts so that dish is secure.


29_07


Slide LNBF into end of arm, and tighten bolt so that LNBF is secured to the arm.


Your dish and tripod should now look something like this:

29_08

From this point, you’ll want to align the dish and run cables as outlined in our self-installation document. When this is done, you can secure the cables using the cable clip that was included with the dish.

Untitled

Your dish should now be fully assembled and ready for use! If you require any further assistance with your installation, please do not hesitate to contact us here, on Facebook, Twitter, or by calling our Technical Support team at 1.888.554.7827.

Go Green With Shaw Direct

22_binYou try to do your part to help protect the environment; you recycle, shop locally, walk or bike to nearby destinations. So, why not sign up for Paper-Free Billing and Pre-Authorised Payments through Shaw Direct?

With Paper-Free Billing, you don’t have to worry about wasting paper and ink from the bill and envelope, or about the energy used to print and transport the bill to you. Instead, you receive an emailed notification each month to let you know that your bill is ready. Just click the link in the email, and you can login to your Self Serve account to view your most recent bill, and up to five of your past bills. Plus, you don’t need to worry about losing your bill, or not receiving it on time due to a delay with your mail!

If you sign up for Pre-Authorised Payments, say goodbye to  driving to the bank each month, or writing a cheque and mailing the payment to us! You can save time, money, and natural resources. And, your payment will be withdrawn on the same day every month, so you never have to wonder when you’ll see the money come out of your account.

As an added bonus, if you sign up for both Paper-Free Billing and Pre-Authorised payments at the same time, we’ll give you a small present as a token of our appreciation: you can choose from either two free Pay Per View or Shaw Direct On Demand Movies (to a maximum cost of $6.99 – cannot be applied towards events or adult titles), OR a one-time $5.00 discount on your next bill! If you would like to sign up, log in to your Self Serve account, or send us a note; we can be reached in the comments below, on Facebook, Twitter, or through email.

Shaw Direct is proud to do our part to be environmentally-conscious, too. Besides offering options like Paper-Free Billing and Pre-Authorised Payments, our head office uses electricity from a green energy provider, and are in a BOMA BESt certified building. We’re also happy to offer our HDPVR 630 with large cooling vents to allow for efficient heat dispersal, and a variable speed fan that only runs as fast and as long as needed to maintain an appropriate operating temperature to help reduce the energy required to watch and record your favourite shows.

Have any questions for us? As always, don’t hesitate to leave a comment for us!

*rg

Move Program

moveprogram_blogHave you recently moved or are in the works of moving in the near future? It’s already stressful enough with the packing, cleaning, and so many other responsibilities that are known with moving, why add getting your TV services set-up to that list of worries? Here at Shaw Direct, we make it easy for our customers to get settled in their new home and help create a warm welcome.

The whole process is just one easy step: Give us a call! Any one of our representatives (available 24/7) can help get you going; just let us know the address of your new location and we’ll set-up an installation with a local installer on an open date that suits you best. As an added bonus, our Move Program is little to no cost for our existing customers! Have you had the services for over 12 months? Then the Move Program will cover the cost of a new dish installation at the location, as well as the installation of one receiver completely free of charge! Any additional receiver installs will be done at a highly discounted price of half off regular receiver installations – $25.00. Have you not had our services for over 12 months yet? Still no need to worry! The new dish install and the first receiver install together cost $25.00, and any remaining receivers needing to be hooked up are likewise $25.00 per receiver.

Make sure to pack up your receivers and remotes with everything else, but when it comes to the dish just leave the current dish at your old location and rest assured we’ll hook you up with a brand new dish with the newest technology at your new home. We recommend calling as much in advance as possible so we can ensure having the best availability for installation dates at the new location. Lastly, for those customers moving to an apartment or a condo most installers will require written permission from the landlord to be presented at the time of install so they can move forward.

Now that you’ve got all the info on our quick and easy Move Program, be sure to kick up your feet and relax while enjoying Shaw Direct service from day one in your new home!

*ke

Programming Your Remote

No one likes having to juggle multiple remotes to control all of their entertainment devices. Luckily, you can program your Shaw Direct satellite remote to work with most devices, which will allow you to consolidate up to three remotes!

There are two main types of remote controls that we currently carry: the IRC 600, and the URC 600. They’re nearly identical to each other, except for a couple of small differences.

19_remotes
The remote on the left is the IRC 600, and the remote on the right is the URC 600.

Take a close look at the SOURCE and ASPECT buttons near the top of the remote. If the two buttons are black, you have the IRC 600; if the buttons are white, then you have the URC 600.

The first step to programming your remote control to work with other electronics is to find the code(s) associated with the particular brand and device. Some brands can have dozens of potential codes, so the simplest way to go about this is to scan for the code.

Here’s how you can scan for a code with the IRC 600:

  1. Scanning Method to Program TV
  2. Press and hold SAT until the mode buttons flash at least three times.
  3. Enter 9-9-1. SAT should blink twice.
  4. Press CH+ once per second until the receiver turns off. (If you pass the correct code, press CH- to scan backwards).
  5. Press SAT to lock in the code. The SAT key should blink twice.

Here’s how to scan for a code if you have the URC 600:

  1. Verify that the device is on.
  2. Press and hold ENTER and MUTE until the mode buttons flash in rotation.
  3. While aiming the remote at the device, press and hold the up arrow button until the TV turns off.
  4. Press MUTE, once.
  5. Device should power back on. If not, repeat steps 3 and 4.
  6. Press ENTER to lock in the code if the device turned on.

Once you’ve successfully locked in the codes for your devices, you can control power, volume, and other functions with the Shaw Direct remote by pressing the corresponding mode button (TV or AUX). If you want to simplify things even more, you can program your remote for master volume and master power.

Programming Master Volume for the IRC 600:

  1. Press and hold SAT until the mode buttons flash at least three times.
  2. Press 9-9-3. The SAT key should blink twice.
  3. Press the device key (TV or AUX) to lock volume to. The device key will blink twice.

Programming Master Volume for the URC 600:

  1. Hold both ENTER and SAT until the SAT button illuminates.
  2. Press VOLUME UP, then TV. The SAT button will blink 3 times and go out.

Programming Master Power for the IRC 600:

  1. Press and hold SAT until the mode buttons flash at least three times.
  2. Press 9-9-5. The SAT key should blink twice.
  3. Press and release each device key once, in the order you want them activated in the Master Power sequence.
  4. Press POWER to save the sequence. The SAT key should blink twice.

Programming Master Power for the URC 600:

  1. Hold both ENTER and POWER until the SAT button illuminates solid red.
  2. Press 1. SAT will blink 3 times and go out.
  3. Press SAT once to return remote to SAT mode.

That’s all there is to it! If you encounter any issues while trying to program your IRC or URC 600 remote control, let us know so we can lend a hand.

*rg