Tag Archives: how-to

Parental Controls on 600-Series Receivers

ratings

We carry a wide selection of programming for audience members of all ages. Of course, this means that there may be content that you don’t want the young ones in your home to view. That’s where parental controls come in. Parental controls on the Advanced 600-Series receivers allow you to enable locks specific channels, and certain ratings for both TV shows and movies.

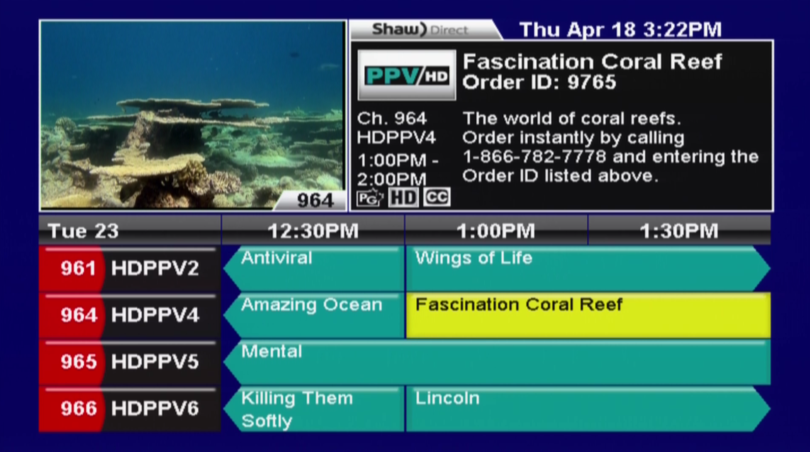
Rating information is provided by the individual broadcasters, and this information is entered into our interactive programming guide. When you’re looking at a show that is listed in the guide, press INFO on your remote to see what the rating is.

Certain shows (for example, documentaries or older programs) may not have ratings assigned to them. If you’re concerned about potential content in unrated programs, the 600-Series also allows you to lock content without ratings, too.

In order to set parental locks, press OPTIONS on your remote, and then 2 for “Parental Controls.”

The first time you enter this menu, you’ll see a prompt asking you to enter a four-digit code for your parental locks. Choose your code (as a tip, don’t use something like the last four digits of your phone number, or something like a birth date as these may be common knowledge in your household), and then press ENTER. You will then be asked to confirm the four-digit code you just entered. Punch this in, and press ENTER again.

parentalcontrolscreenYou’ll now see a screen pop up called “Parental Controls.” The first thing you’ll want to do is highlight the line for “enable locks,” and scroll to the right using the arrow keys until you see “enabled.” This will turn on the locks that you’ll set momentarily.

The next two lines will be “TV rating” and “Movie rating.” Highlight whichever you’d like to edit, and then use the right or left arrow keys to scroll through the different ratings. As a tip, the rating you choose means that that rating, and anything above it will be locked. So, if you choose to lock PG for TV ratings, 14+ and 18+ will also be locked.

Next, you’ll see “locked channels.” Use the left or right arrow keys to either “hide” or “show” channels with locked content. The option just below is “locked” programs, which you can do the same with. After this, you’ll see “channel locks,” which allows you to lock the content of a specific channel.

Below this is “change password,” which of course allows you to enter a new four-digit code.

The last item is “unrated programs,” which comes in handy in a couple of different situations. As mentioned earlier, some programs may not actually have a rating assigned, so you can’t be sure if the content is appropriate for your kids. Locking content without a rating removes this risk. The second scenario can happen after your receiver has been reset, or the guide information is reloading. The guide will not have any information in terms of program title or rating, so enabling locks will lock all channels until the guide information has been restored.

Have any questions about parental controls on the Advanced 600-Series? Leave us a comment below!

*rg

Ordering Shaw Direct Pay Per View

ppv_entertainmentPerhaps you’re a fan of sporting events like UFC. Maybe you can’t get enough of the latest Hollywood hits. Or, perhaps 3D movies are your thing. Whatever your preference, Shaw Direct’s 32 HD Pay Per View channels have got you covered! Pay Per View is available to all Shaw Direct customers, so even if you don’t have a high speed Internet connection capable of supporting Shaw Direct On Demand, you can still enjoy the latest movies.

Our Pay Per View channels run from 950 to 953 for standard definition, or 960 to 983 for high definition, plus 986 is devoted to nothing but 3D movies. If you can’t view all of the listed Pay Per View channels in your guide, you may need an upgrade to part of your system; if you would like more information on upgrading, check out our previous article on the topic.

If you’ve never ordered Pay Per View before on your Advanced 600-Series receiver, it’s easy. First, open up your interactive programming guide by pressing GUIDE on your remote, and then navigate to the Pay Per View channels you’d like to browse (depending on whether you’d like to view standard definition, high definition, or 3D).

You can scroll through the Pay Per View channels by using the up or down arrow keys on your remote, and you can view what’s on later by pressing the right arrow (jumps ahead by 30 minutes), the fast forward button (jumps ahead six hours), or the skip forward button (jumps ahead one full day).

orderid

When you’ve found what you’d like to order, highlight the listing and look at the description of the title in the top right-hand corner of your guide. Just underneath of the title of the program, you’ll see “Order ID” followed by a four-digit number. Note this, and then call 1.866.782.7778. Follow the prompts provided by the phone system, and when asked, enter the four-digit order ID.

Once this has been completed, you’ll just need to go to the channel that the order was made for at the time the program is scheduled to start, and you’re ready to go!

For those of you who use PVRs, you can record Pay Per View titles that you’ve ordered, and you will have 48 hours to watch the title from your PVR list. After the 48-hour period has passed, the title will expire.

Wondering what’s on this month? You can view a list of the newest releases here.

*rg

Smart Recording

If you have an Advanced HDPVR 630, you may have heard of “smart recording.” But what exactly is it?

By using smart recording, your PVR will automatically look for the earliest airing of a program that matches your event criteria. So, if you’ve said that you only want to record new HD episodes of Elementary, your PVR will go through the listings and find the first scheduled showing of a new episode, in HD only.

You can also set priority levels for each show that you set reoccurring recordings for, so when your PVR is scheduling its recordings, it will start with the highest priority shows first, and work its way down. This customisation ensures that exactly what you expect to see recorded will be waiting for you in your PVR list.

In the event of a recording conflict, your PVR will adjust to find a different time to record a show that is set to smart record in order to resolve the conflict. It’s like a referee for your TV. Creating smart recording events allows your PVR to have the maximum flexibility so it can work to record as much content as possible.

Recording conflicts will occur when there are more recordings scheduled than tuners available.  The Advanced HDPVR 630 can record up to two programs at the same time as it has two available tuners.

If there were three recordings scheduled manually through the guide at the same time, there will be a recording conflict and only two shows will wind up being recorded.

By using smart recordings, the PVR will find an alternate time for the show with the lowest priority. How can you tell what has the lowest priority without customising this? As a rule, the PVR will choose the shows on the two lowest channel numbers. So, if you had manually scheduled recordings for shows on channels 12, 36, and 43, if you did not adjust the priority settings, the shows on channels 12 and 36 would be recorded.

Here is how you can schedule a smart recording for a reoccurring series on your Advanced HDPVR 630:

1. Press the GUIDE button on your remote and find the program you would like to record.

2. Highlight the program in question, and press ENTER/OK. This will bring up the “Program Options” menu.

3. Press the DOWN arrow button and highlight either “Smart record new episodes” or “Smart record all episodes” and then press ENTER/OK. The recording will now schedule. If you are recording a show that is no longer being made, you would be best to record all episodes, whereas if you are recording a show that is still in production and have seen past episodes, it may be best to record new episodes.

progopt


Next, you can edit the settings for your scheduled recordings:

1. Press EXIT to close the guide, and then press MENU. This will bring up a menu bar along the bottom of your screen.

2. Press the RIGHT arrow button and highlight “PVR.” Press ENTER/OK.

menupvr

3. Press the RIGHT arrow button and highlight “Options,” then press ENTER/OK. This will take you into a list containing all of the programs that you have scheduled to record.

menupvr2

recordings4. Find the one you would like to edit, highlight it by pressing either the UP or DOWN arrow button, and press ENTER/OK. This will bring up the “Edit Recording Event” menu.

5. From this menu, you can change the priority, delete the recording event, change the recording recurrence, select a channel you would like to record the program on, and more. Changing the priority will mark how important the show is to you in terms of scheduling (as discussed earlier). Recurrence changes between recording all episodes or new ones.

event

If you have any questions about smart recordings, don’t hesitate to ask us!

*rg

Anik G1 Upgrades

Shaw Direct’s third satellite – Anik G1 – went live on May 29, 2013. This has enabled us to add tons of new and exciting channels in both standard and high definition! We’re also very proud to say that we now carry the most HD channels in Canada: over 210.

So, what exactly do you need to access the great new Anik G1 channels? You’ll need an xKu LNBF installed on your dish, and a 6XX-series receiver (the Essential HDDSR 600, Advanced HDDSR 605, or Advanced HDPVR 630).

In order to help you figure out if you’re G1-ready, we’ve added a special channel so you can find out exactly what you need. To get started, turn to channel 988; once you’re here, press INFO and you’ll see one of four messages:

988 - Quad + 00.FE - Info

This means that you’re using one of our older receivers, and have an older style LNBF. If this is the case, you can contact us to arrange an LNBF upgrade and to look into getting a new receiver (or more) so you’ll be able to enjoy our new channels.

988 - Quad + 6XX - Info

If you see this message, then you’ve got the right receivers, but will need a new LNBF. Contact us to arrange an upgrade for your LNBF.

receiver

This message means that you’ve got the correct LNBF, but will need a different receiver to access the new channels. Contact us to find out about getting a new receiver.

988 - xKu + 6XX - Info

If this is the message you’re getting, then you’re already set to start watching the new channels right now!

If you have more than one receiver in your home, we recommend checking channel 988 on all of them to see what the status is for each one.

In the event that you do need an upgrade to your LNBF, we can either have an installer go out to put it in for you, or if you’re in an area that doesn’t have a local installer, we can have a new LNBF shipped out to you.

*rg

Multiswitches

A quad LNBF (left) and xKu LNBF (right).

Shaw Direct satellite dishes are equipped with LNBFs that allow up to four lines to be run into your home. Most of our receivers require just one line to function, but our PVRs (both our original DVR 530 HD and newest Advanced HDPVR 630) need two lines. If you want to enjoy service to multiple rooms in your home, you may find that you’ll wind up needing more than four lines. If this sounds like you, then you’ll be happy to learn that we can offer a device known as a “multiswitch” in order to have more lines installed for more receivers!

But just what is a multiswitch?

A multiswitch is a device that consists of A/B switches (which switch back and forth between horizontal and vertical polarities, depending on what channel you’re trying to watch) and splitters that turn each LNBF port from one into two (or more depending on the type of multiswitch you have).

4x8_multiswitch_largeAlthough they may sound a bit like a simple splitter, a multiswitch cannot be replaced by a splitter. Without the help of the A/B switch, splitting a single line into two will cause issues with receiving signal. If one receiver connected to a split line is viewing a channel on the horizontal polarity, then the second receiver on the split line will only be able to view another horizontal channel; it will not be able to access a channel on the vertical polarity). For more information on the two different signal polarities that we use, please see our article on LNBFs.

5x8_multiswitch_large
A 5×8 multiswitch.

Shaw Direct generally uses a “4×8” multiswitch, which just means that it needs the four lines running from your LNBF connected to the four inputs, and then it can output signal for up to eight distinct lines. We also use a “5×8” multiswitch; the difference between this and the 4×8 is that there is an extra input that can be used to connect cable services.

For commercial applications where more than eight lines may need to be run, we also offer a “4×16” multiswitch, which will allow up to 16 lines to be run from the dish.

Multiswitches can be either “passive” (non-powered) or “active” (powered by an external AC source); our multiswitches are all powered to ensure strong signal strength in any system. Longer cable runs can result in lower signal strengths, but using an active multiswitch will help mitigate this.

A multiswitch can be installed either outside near the dish (it’s waterproof and works well in any weather condition), or inside your home (in a utilities room, for example). There must be a connection from each port on the LNBF to each of the four inputs on the multiswitch. From there, the lines would be run from the outputs to wherever in your home you require service. Remember that each account has a six-receiver limit, and if you wanted more than six receivers, you would have to open a second account.

If you’re thinking of adding a new receiver, but need a multiswitch in order to do so, don’t hesitate to contact us through here, on Facebook, Twitter, or by calling our toll-free number – 1.888.554.7827.

Setting Up a Dish on a Tripod

If you use our Home Away From Home program and take your services with you, or live in an apartment building or condo where you can’t install a dish on the building, putting a dish on a tripod may be the best option for you. Wondering how to put it all together? Here’s a quick guide for you to follow!

Once you’ve ordered and received your tripod and dish kit, you’ll need to choose a location to set everything up. Our satellites are located above the Equator, due south of Fort McMurray, Alberta (111.1° west longitude), so generally speaking, you will need a clear line of sight to the south (if you live west of Fort McMurray, the view should be more to the southeast, while if you live east of there, it should be more to the southwest).

29_map

29_01You should have the dish, tripod and post that goes into the tripod, feed support arm, clamp mount, cable clip, and LNBF, and stabilizing screws (these would be used to keep the dish secured to the ground, kind of like spikes for a tent). You will require wrenches, vice grips, or pliers to complete this job.


29_02


First, you’ll want to set up the tripod itself. Start by pulling the legs apart so that the tripod is standing upright.

Now, insert the pipe into the centre of the tripod, and tighten the bolts until the pipe is secure.

29_03


Attach the clamp mount to the dish by aligning bolt posts with slits on sides.Ensure that the larger side of the bracket (right side of photo) is pointing towards the bottom of the dish.


29_04


Insert screw bolts into holes on back of dish. 

Tighten only very lightly at this point.


29_05


Take the dish, and attach the feed support arm to it, tightening bolt until secure.


29_06


Place dish on tripod and tighten bolts so that dish is secure.


29_07


Slide LNBF into end of arm, and tighten bolt so that LNBF is secured to the arm.


Your dish and tripod should now look something like this:

29_08

From this point, you’ll want to align the dish and run cables as outlined in our self-installation document. When this is done, you can secure the cables using the cable clip that was included with the dish.

Untitled

Your dish should now be fully assembled and ready for use! If you require any further assistance with your installation, please do not hesitate to contact us here, on Facebook, Twitter, or by calling our Technical Support team at 1.888.554.7827.

Using an External Hard Drive with your HDPVR 630

header_HDDShaw Direct’s Advanced HDPVR 630 has an integrated hard drive which allows you to record up to 175 hours of standard definition content, or about 45 hours of high definition content. Not enough space for all of the great shows you want to record? Not to worry – if you need more space, you can use an external hard drive to make sure you don’t miss a thing.

Wondering what kind of external hard drive will work with your HDPVR 630? Here are the required features to ensure compatibility:

  • Make sure the external hard drive has an eSATA connection, which is up to six times faster than even USB 2.0. This makes the external hard drive ideal for HD video. What’s more is that you can record two HD programs while watching previously recorded HD programming without any performance issues.
  • The external hard drive must be externally powered. Some may only be USB powered, but this will need to have its own power supply that plugs into an AC outlet.
  • The largest external hard drive that will work is 2.0 TB, which will give you an incredible amount of additional storage space. 500 GB will give you about 340 hours of standard definition or 90 hours of high definition; 1.0 TB will provide about 680 hours of standard definition or 180 hours of high definition; 2.0 TB gives you a staggering 1,360 hours of standard definition or 360 hours of high definition. If you were to fill a 2.0 TB external hard drive and the hard drive of your PVR with standard definition programming, you could watch shows from today (March 7) non-stop until May 10!
  • Look for an external hard drive that is rated for PVR or DVR usage. These are designed to be cooler, quieter, and support multiple HD streams being recorded or played at the same time. They’re also able to run all-day, everyday, which makes them the most reliable choice.

So, how do you go about hooking up the external hard drive to your PVR? There are just a few steps to get it ready:

  1. Connect the eSATA cable (it should be provided with the drive you purchased) from the external hard drive to the port labeled “eSATA” on the back of your HDPVR 630.
  2. Connect the power cable from your external hard drive to a power bar or wall outlet.
  3. If your external hard drive has a power switch, turn it on now. Ensure the power or status light illuminates.
  4. Restart your HDPVR 630 by holding down the power button on the front panel for 10 seconds.
  5. When the receiver comes back on, a setup wizard will guide you through the process of formatting the external hard drive for use with this satellite receiver. This will remove ALL data and partitions on the external hard drive.
  6. Formatting will complete within a few seconds and you will be alerted that your drive is ready for use.

There are some other things to bear in mind about using an external hard drive with your HDPVR 630. For example, you can only use one external hard drive with your PVR at any given time, and you can only use the external hard drive with one specific PVR. Additionally, the external hard drive won’t be able to be used with any other device while it’s “married” to your PVR.

If you decide to stop using your external hard drive with your PVR, or want to switch to a new one, you just need to disconnect it and reboot your PVR. The setup wizard will then alert you that your external hard drive is missing, and then will provide some prompts to delete it from your PVR. This will remove any associated recordings from the PVR list that were stored on the external hard drive, allowing you to connect a new one by following the setup instructions.

Having any problems using an external hard drive with your HDPVR 630? Check out Tech Central to read over some helpful tips, or let us know that you need a hand!