
If you use our Home Away From Home program and take your services with you, or live in an apartment building or condo where you can’t install a dish on the building, putting a dish on a tripod may be the best option for you. Wondering how to put it all together? Here’s a quick guide for you to follow!
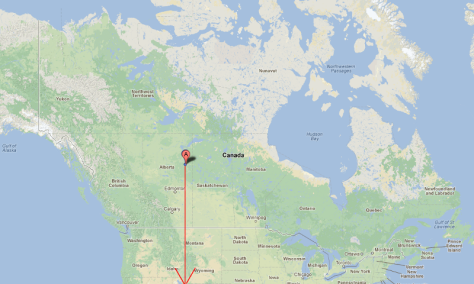
Once you’ve ordered and received your tripod and dish kit, you’ll need to choose a location to set everything up. Our satellites are located above the Equator, due south of Fort McMurray, Alberta (111.1° west longitude), so generally speaking, you will need a clear line of sight to the south (if you live west of Fort McMurray, the view should be more to the southeast, while if you live east of there, it should be more to the southwest).
 You
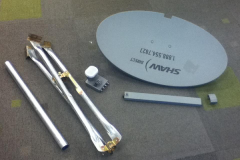
should have the dish, tripod and post that goes into the tripod, feed
support arm, clamp mount, cable clip, and LNBF, and stabilizing screws
(these would be used to keep the dish secured to the ground, kind of
like spikes for a tent). You will require wrenches, vice grips, or
pliers to complete this job.
You
should have the dish, tripod and post that goes into the tripod, feed
support arm, clamp mount, cable clip, and LNBF, and stabilizing screws
(these would be used to keep the dish secured to the ground, kind of
like spikes for a tent). You will require wrenches, vice grips, or
pliers to complete this job.
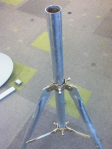
First, you’ll want to set up the tripod itself. Start by pulling the legs apart so that the tripod is standing upright.
Now, insert the pipe into the centre of the tripod, and tighten the bolts until the pipe is secure.
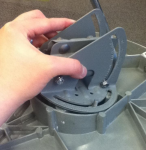
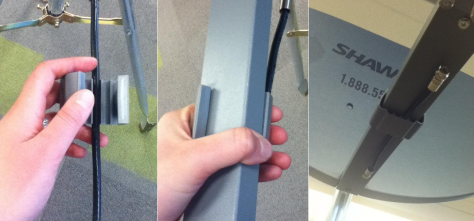
Attach the clamp mount to the dish by aligning bolt posts with slits on sides.Ensure that the larger side of the bracket (right side of photo) is pointing towards the bottom of the dish.
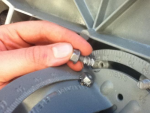
Insert screw bolts into holes on back of dish.
Tighten only very lightly at this point.
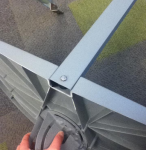
Take the dish, and attach the feed support arm to it, tightening bolt until secure.
Place dish on tripod and tighten bolts so that dish is secure.
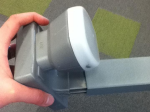
Slide LNBF into end of arm, and tighten bolt so that LNBF is secured to the arm.
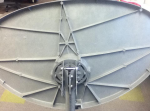
Your dish and tripod should now look something like this:

From this point, you’ll want to align the dish and run cables as outlined in our self-installation document. When this is done, you can secure the cables using the cable clip that was included with the dish.
Your dish should now be fully assembled and ready for use! If you require any further assistance with your installation, please do not hesitate to contact us here, on Facebook, Twitter, or by calling our Technical Support team at 1.888.554.7827.

One very important part of this setup is to make sure the pipe in the tripod is level before you put the dish on it and that the tripod is securely fastened so that it does not move or get blown over before you mount the dish onto it. This ensures the settings on the back of the dish will be correct when you go to aim the dish.
Hi Peter. That’s a great point, and thank you for mentioning it! *rg